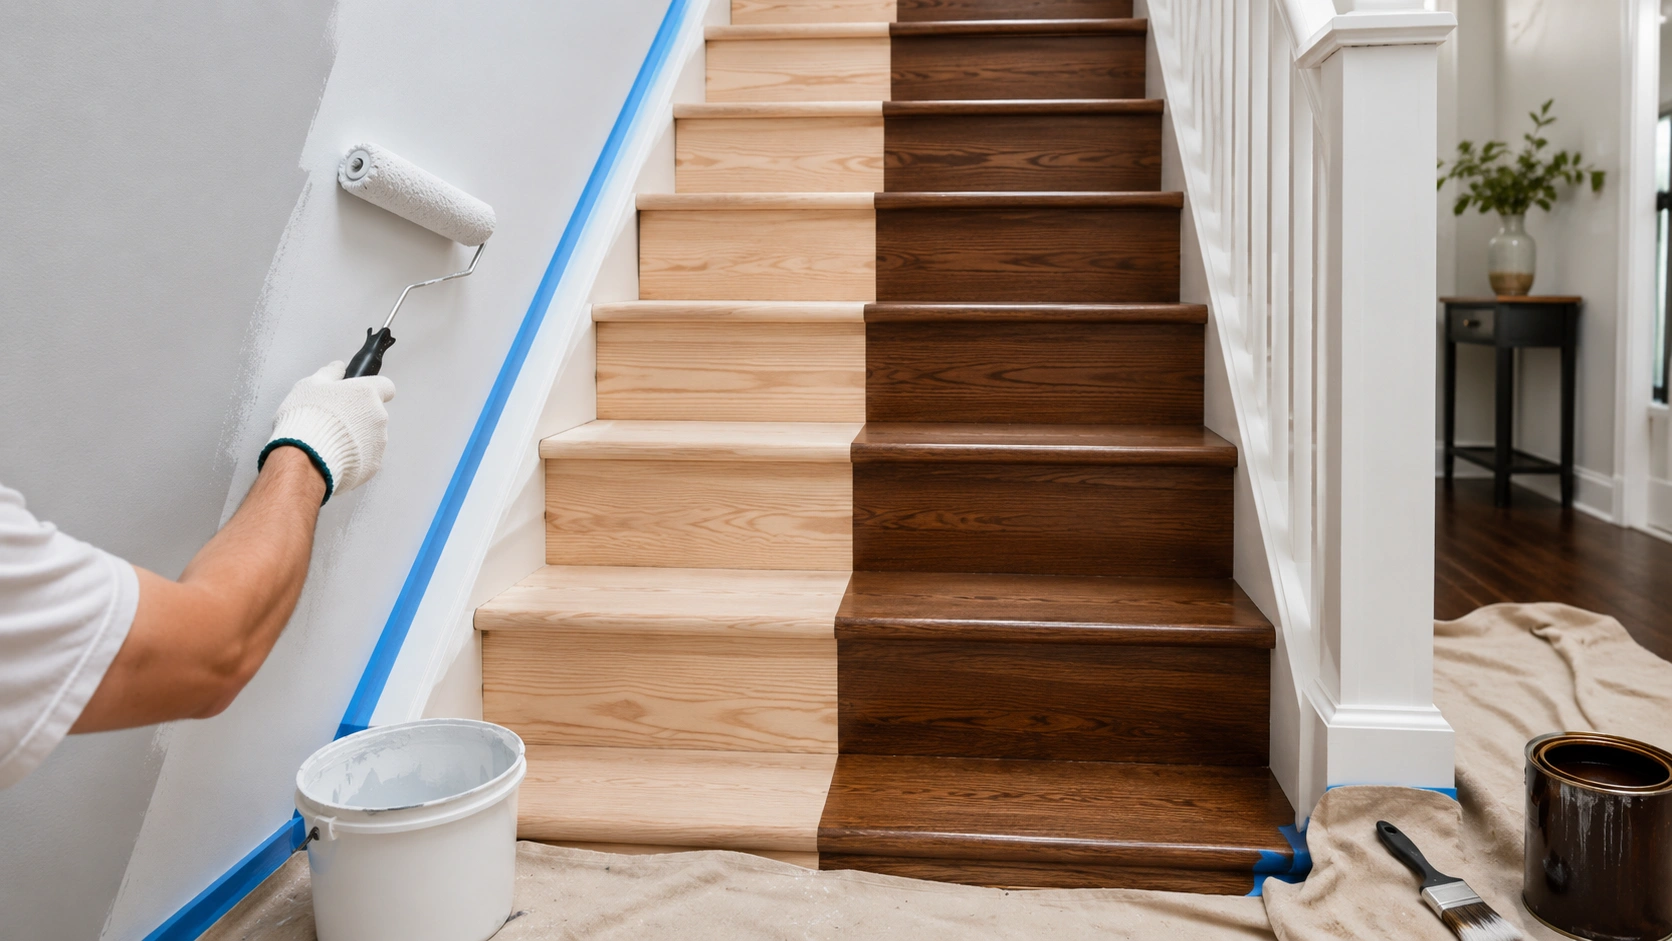
Should you paint the walls before staining stairs is one of the most common questions homeowners ask during a staircase makeover, and the best answer is: yes, in most cases, paint the walls before staining stairs — but only after the messy stair prep is finished. If your stairs still need sanding, stripping, repairs, or old finish removal, do that first. Then clean the sanding dust, paint the stairwell walls, protect the edges with painter’s tape, stain the stair treads, and finish with polyurethane.
The reason is simple. Sanding stairs before painting walls prevents dust from sticking to fresh paint. But once the stairs are sanded and cleaned, painting the walls first helps you avoid dripping paint onto newly stained wood. The safest painting walls and staining stairs order is not just about what looks better. It is about preventing paint drips, stain splatter, peeling tape, damaged finishes, and extra touch-ups.
Should You Paint the Walls Before Staining Stairs?
In most DIY situations, you should paint walls before staining stairs if the stairs are already sanded, repaired, and cleaned. This gives the stairwell a clean finished background before you apply wood stain to the treads. It also reduces the risk of wet wall paint dripping onto fresh stain or a new polyurethane varnish finish.
However, this rule changes if the stairs still need major prep. If your staircase has old paint, old stain, carpet glue, a worn polyurethane finish, dents, scratches, or rough patches, the stairs should be prepared first. That means removing the old finish, repairing damage, sanding the raw wood, vacuuming, and wiping everything down before you paint the walls.
A simple rule is:
Do dusty work first, paint the walls second, stain the stairs third, and touch up last.
This order works because sanding dust can cling to fresh wall paint, especially if the paint has a flat or eggshell sheen. A sander, sanding sponge, or even a careless ladder can also scuff or gouge freshly painted walls. Once the dusty work is done, the walls can be painted more safely.
The best overall stair refinishing order is:
prep stairs → sand stairs → clean dust → paint walls → mask surfaces → stain stairs → seal stairs → do final paint touch-ups.
This approach gives you the cleanest finish with the lowest chance of rework.
The Best Order to Paint Walls and Stain Stairs
The best order to paint and stain stairs depends on the condition of your staircase, but most projects follow the same general sequence. The goal is to finish dirty, dusty tasks before fresh paint and finish products are applied.
| Project Stage | Best Timing | Why It Matters |
| Remove old carpet, paint, or stain | First | Prevents damage to finished walls later |
| Sand and repair stairs | Before painting walls | Keeps sanding dust off fresh paint |
| Clean the stairwell | Before painting | Removes dust, debris, and residue |
| Paint stairwell walls | Before staining | Avoids paint drips on finished wood |
| Mask walls, risers, and trim | After paint dries | Protects surfaces from stain |
| Stain stair treads | After masking | Gives wood its final color |
| Apply polyurethane | After stain dries | Protects high-traffic stairs |
| Final touch-ups | Last | Fixes tape marks, chips, or small mistakes |
Start by removing any carpet, carpet staples, old paint, old stain, or leftover clear coating. If the stairs are damaged, fill dents and repair loose boards before sanding. For most stair projects, fine-grit sandpaper or 220-grit sandpaper is used near the end of prep to smooth the surface before staining.
After sanding, vacuum the entire stairwell. Dust often hides on baseboards, stair stringers, risers, handrails, spindles, and wall corners. Wipe surfaces with a damp cloth or lightly with warm soapy water where appropriate, then let everything dry.
Once the dust is gone, paint the walls. After the wall paint has dried enough, use painter’s tape, drop cloths, and careful masking to protect the painted surfaces. Then stain the stair treads and apply a protective finish such as polyurethane.
When You Should Sand Stairs Before Painting Walls
You should sand stairs before painting walls whenever the stairs need refinishing, stain removal, old paint removal, or surface smoothing. This is one of the most important parts of the stair refinishing order because sanding creates a surprising amount of dust.
Even careful sanding can send dust onto nearby stairwell walls, trim, baseboards, and railings. If the walls are freshly painted, that dust can stick to the surface and make the finish look dull or dirty. In some cases, you may have to wipe the walls aggressively, which can damage fresh paint.
Sanding also involves tools and movement in a tight space. A floor sander, sanding block, or ladder can easily bump the wall. Stairwells often have tricky angles and tight corners, so it is better to do the rough work before the wall paint goes on.
This is especially important if you are working with:
- old stained wood stairs
- carpeted stairs being converted to stained treads
- painted stairs being stripped back to wood
- damaged stair treads with dents, nicks, or scratches
- dark stain that requires a clean, even wood surface
The goal is to create a smooth surface before any final finishing begins. After sanding, vacuum thoroughly and wipe away remaining dust. Only then should you move to wall painting.
Why Painting Walls First Often Makes Sense After Prep Is Done
Once the stairs are sanded and cleaned, painting walls before staining stairs usually makes the most sense. The biggest reason is that paint drips are easier to control before the stair treads receive stain and polyurethane.
Freshly stained stairs are more sensitive than painted walls. If wall paint drips onto a newly stained tread, you may need to sand and refinish that spot. If paint lands on a cured polyurethane surface, it may still leave marks or require careful scraping. On the other hand, if stain lightly marks a painted wall, you can often fix it with primer and a small paint touch-up.
Painting walls first also makes the staircase look more complete before the final wood finish is added. This helps when choosing the right stain color because the stained treads, painted risers, trim, and wall color all need to work together.
Think of the walls as the backdrop and the stairs as the final feature. Once the backdrop is painted, the staircase can be stained and sealed as the finishing touch.
How Long Should Paint Dry Before Staining Stairs?
One of the biggest mistakes in a stair project is confusing dry time with cure time. Paint may feel dry to the touch within hours, but that does not always mean it is ready for tape, masking, or heavy handling.
Before staining stairs near freshly painted walls, give the paint enough time to dry properly. Many homeowners wait at least 24 hours, but the exact timing depends on the paint type, humidity, temperature, airflow, and number of coats. If the stairwell is humid, cold, or poorly ventilated, the paint may need longer.
This matters because painter’s tape can peel fresh paint if applied too soon. Even if the paint feels dry, pressing tape firmly against it can pull off the top layer when removed. For recently painted stairwell walls, use delicate-surface painter’s tape and remove it carefully.
| Timing Concern | What to Know |
| Paint dry time | Surface may feel dry before it is fully strong |
| Paint cure time | Paint continues hardening after it dries |
| Painter’s tape | Fresh paint can peel if taped too early |
| Humidity | Slows drying and curing |
| Ventilation | Helps paint, stain, and polyurethane dry better |
If you need to stain soon after painting, avoid aggressive taping. Use light pressure, protect nearby surfaces with drop cloths, and work slowly with a small brush near the wall edge.
How to Protect Painted Walls When Staining Stairs
Protecting walls is one of the most important parts of how to protect painted walls when staining stairs. Wood stain contains pigment, and that pigment can leave visible marks on painted surfaces. Dark stains are especially risky near white risers, white trim, or light-colored stairwell walls.
Start by making sure the wall paint has dried long enough. Then apply painter’s tape along the wall border, baseboards, skirt boards, and areas where the stair treads meet painted surfaces. If the paint is fresh, use tape designed for delicate surfaces.
Cover nearby walls and trim with plastic sheeting or a drop cloth where needed. A canvas drop cloth works well for floors, but plastic may be useful for vertical surfaces because stain can soak into fabric. Around tight edges, use a small paintbrush or staining pad instead of overloading a rag or brush with too much stain.
When staining near painted risers or walls, use less product than you think you need. Heavy stain application increases the chance of drips, bleeding, and uneven color. Wipe excess stain quickly and keep a clean cloth nearby.
A good protection strategy includes:
- painter’s tape along wall edges and risers
- drop cloths over nearby flooring
- plastic sheeting for vertical wall protection
- a small brush near corners and trim
- immediate cleanup of stain drips
- slow tape removal after staining
The main idea is simple: mask carefully, stain lightly, and clean mistakes immediately.
Should You Paint Risers Before Staining Treads?
For many staircase makeovers, the design includes painted risers with stained treads. This creates a classic look, especially with white risers and darker stained wood steps. The question is whether to paint risers before staining treads or stain treads before painting risers.
For most DIY homeowners, it is usually easier to paint risers first, let them dry, mask them carefully, and then stain the treads. This works well if you are patient with tape and careful near the edges.
However, some professionals prefer to stain the treads first and then paint the risers. This can create cleaner paint lines because paint is often easier to control and touch up than stain. But for beginners, stain can be harder to fix if it gets onto painted surfaces, so the best approach depends on skill level.
A practical order is:
- Sand and prep both treads and risers.
- Prime and paint the risers.
- Let the paint dry properly.
- Mask the risers with painter’s tape.
- Stain the treads carefully.
- Apply polyurethane after the stain dries.
- Touch up riser paint if needed.
If the risers are already painted and only the treads need staining, protect the risers very carefully. Dark stain on white risers can be difficult to clean.
Paint, Stain, or Both? Choosing the Best Stair Finish
Before deciding the final project order, it helps to understand the difference between painting stairs, staining stairs, and using both. Each finish creates a different look and has different maintenance needs.
Painted stairs are great for hiding imperfections. If your stairs have patchy grain, mismatched tones, old repairs, or visible flaws, paint can create a clean and modern finish. Paint also offers more colour flexibility, so you can use white, black, soft grey, or a bright accent color.
Stained stairs are better when the wood itself is attractive. Stain highlights the natural wood grain, knots, and wood character. Stained treads can create warmth and a classic look, especially with a rich walnut stain or natural finish. The downside is that stain does not hide flaws as well as paint.
Using both is very common. A staircase with painted risers and stained treads gives you the clean contrast of paint and the durability of visible wood.
| Finish Type | Best For | Main Concern |
| Paint | Hiding flaws and adding color | Can chip or show scuffs |
| Stain | Showing natural wood grain | Requires better wood condition |
| Paint + stain | White risers and wood treads | Needs careful masking |
| Professional finish | High-traffic stairs | Costs more but reduces mistakes |
For high-traffic stairs, durability matters. Kids, pets, shoes, and daily foot traffic can wear down weak finishes quickly. That is why stain is usually paired with protective coats of polyurethane.
What Happens If You Stain First and Paint Later?
You can stain stairs before painting walls, but it often creates more risk. Freshly stained and sealed stairs need protection from paint drips, ladder movement, drop cloth friction, dust, and foot traffic.
If you stain first and then paint the stairwell walls, you must cover the treads extremely well. Even small paint splatter can stand out on a dark stained surface. If the polyurethane is still curing, pressure from shoes, ladders, tape, or drop cloths can leave marks.
Staining first may make sense if the walls only need a small touch-up or if a professional crew is handling the work with strong surface protection. But for a typical DIY project, painting the walls after stair prep and before stain is usually safer.
If you already stained the stairs, do not panic. Let the stain and polyurethane dry fully, then protect the stairs with clean, non-sticky coverings before painting. Avoid taping directly onto fresh polyurethane unless the product is fully cured and safe for tape.
What If Stain Gets on Painted Walls or Risers?
If wood stain gets on painted walls or risers, act quickly. Fresh stain is much easier to remove than dried stain. Use a clean cloth to blot the stain gently. Avoid scrubbing hard, especially if the wall paint is fresh, because you may damage the paint surface.
If the stain has dried, the solution may require light sanding, primer, and repainting. Dark pigment stain can bleed through paint if it is not sealed properly, so use a stain-blocking primer before touching up the wall.
For painted risers, the same rule applies. Blot fresh stain immediately. If the mark remains, let the area dry, lightly sand it, prime it, and repaint. This is why keeping leftover wall paint or riser paint is so helpful.
A small stain mark is usually fixable, but prevention is much easier. Careful masking, light stain application, and immediate cleanup are the best defenses.
How to Use the Stairs While Stain and Polyurethane Dry
A major challenge in stair refinishing is figuring out how to use the stairs while stain and polyurethane dry. This is especially important if the staircase is the only route to bedrooms, bathrooms, or an upstairs office.
One common solution is to stain every other tread first. This allows you to step only on the dry, unfinished treads while the stained ones dry. Later, you can stain the remaining treads. This method takes longer, but it keeps the staircase partly usable.
You should also plan around household movement. Keep kids and pets away from wet stain and polyurethane. Avoid socks, bare feet, shoes, rugs, or stair runners until the finish is ready. Follow the product instructions for safe foot traffic because drying times vary.
Ventilation matters too. Indoor stair staining can create strong fumes, especially with oil-based products. Open windows where possible, use fans safely, and avoid trapping fumes in an enclosed stairwell.
Common Mistakes to Avoid When Painting Walls and Staining Stairs
The most common mistake is painting the walls before sanding the stairs. This creates extra work because sanding dust can stick to fresh paint and make the walls look dirty. Always complete dusty prep first.
Another common mistake is taping fresh paint too soon. Paint may feel dry, but painter’s tape can still peel it if the paint has not cured enough. Use delicate tape and remove it carefully.
Many DIYers also apply too much stain near risers and wall edges. This causes stain bleeding, splatter, and dark marks on painted areas. Use a small brush and apply stain in controlled amounts.
Other mistakes include walking on polyurethane too early, skipping wood conditioner on blotch-prone wood, using the wrong sheen on stair treads, forgetting ventilation, and failing to protect baseboards or stringers.
A clean staircase finish comes from patience. Let each stage dry, protect each surface, and save touch-ups for the end.
DIY or Hire a Professional?
A DIY staircase makeover can work well if the stairs only need light sanding, basic painting, and simple staining. If you are comfortable using painter’s tape, sandpaper, stain, and polyurethane, you can likely handle a small project.
However, you may want to hire a professional for heavy sanding, old finish removal, detailed railings, expensive hardwood, or a staircase that gets constant foot traffic. Professional painters and stair refinishers can help prevent uneven stain, dust problems, visible brush marks, and finish failure.
Professional help is also useful if your stairwell has high walls, tight corners, complex spindles, or tricky angles. A pro can create a cleaner finish and may complete the work faster with fewer mistakes.
DIY saves money, but a professional finish may be worth it if the staircase is a major focal point in your home.
Quick Stair Project Order Checklist
Use this simple stair project order checklist before starting:
- Remove carpet, old paint, old stain, or damaged finish if needed.
- Repair dents, nicks, loose boards, and damaged trim.
- Sand stairs before final wall painting.
- Vacuum and wipe away sanding dust.
- Paint stairwell walls and allow proper drying time.
- Paint risers if using painted risers with stained treads.
- Mask walls, risers, baseboards, and stair stringers.
- Stain stair treads carefully.
- Let stain dry fully.
- Apply polyurethane or another protective finish.
- Keep traffic off the stairs until safe.
- Remove tape carefully and complete final paint touch-ups.
This checklist gives you the safest painting walls and staining stairs order for most homes.
FAQs About Painting Walls Before Staining Stairs
Should you paint the walls before staining stairs?
Yes, in most cases you should paint the walls before staining stairs, but only after sanding, stripping, and repairs are complete. The best order is to prep and sand first, clean dust, paint the walls, protect the walls, stain the stairs, seal with polyurethane, and touch up paint last.
Should you sand stairs before painting walls?
Yes. If the stairs need sanding, sand them before painting the walls. Sanding dust can stick to fresh paint, and sanding tools can scuff or damage painted surfaces.
Should you paint risers before staining treads?
For many DIY projects, yes. Paint the risers, let them dry, mask them carefully, and then stain the treads. Some professionals stain first and paint risers later, but DIY users often find it easier to paint risers first and touch them up at the end.
Can wood stain damage painted walls?
Yes. Wood stain can leave pigment marks or discoloration on painted walls, especially if the stain is dark and the wall paint is light. Fresh stain should be blotted immediately. Dried stain may need sanding, primer, and repainting.
How long should paint dry before staining stairs?
Many homeowners wait at least 24 hours, but drying time depends on paint type, humidity, temperature, ventilation, and the number of coats. Paint may feel dry before it is cured enough for tape, so be careful when masking fresh walls.
Should you polyurethane stairs before painting walls?
Usually no. It is often better to paint the walls before applying stain and polyurethane to the stairs. If polyurethane is applied first, you must protect the finished stairs from paint drips, dust, ladders, and foot traffic.
What is the safest order for a DIY staircase makeover?
The safest order is: sand and prep stairs first, clean the dust, paint the walls, mask the painted surfaces, stain the stair treads, apply polyurethane, and finish with touch-ups.
Conclusion: The Safest Order for a Clean Stair Finish
So, should you paint the walls before staining stairs? In most cases, yes — but only after the stairs have been sanded, repaired, and cleaned. The smartest stair refinishing order is to complete dusty prep first, then paint the stairwell walls, then protect the walls before staining the stair treads.
This sequence helps prevent sanding dust, paint drips, stain splatter, peeling tape, and damaged polyurethane. For the cleanest result, follow this order: prep stairs, clean dust, paint walls, mask carefully, stain stairs, seal with polyurethane, and do final paint touch-ups.
Disclaimer: This article is for general DIY and home improvement information only. Results may vary based on materials, tools, and skill level. Always follow manufacturer instructions and safety guidelines when working with paint, stain, and tools.